February 27, 2026
Tile Installation Checklist for Homeowners
Ensure a successful tile installation with this comprehensive checklist, covering planning, materials, tools, and local regulations.

Ensure a successful tile installation with this comprehensive checklist, covering planning, materials, tools, and local regulations.
Tile installation can be tricky, but with proper planning and execution, you can avoid costly mistakes like cracked tiles, uneven surfaces, or water damage. A step-by-step checklist ensures you don’t miss crucial steps, especially when dealing with specific climate and building codes in areas like Sacramento. Here’s what you need to know:
Getting your tile project right starts with solid planning. From picking the perfect materials to gathering the right tools and understanding local requirements, every step matters to avoid costly missteps.
Different rooms call for different tiles. For bathrooms, prioritize water-resistant and slip-resistant tiles. Kitchens, on the other hand, benefit from tiles that are durable and easy to clean. In Sacramento, where seasonal temperature swings can affect materials, porcelain tiles are a smart pick - they’re tough and perform well in various conditions.
For kitchen backsplashes, glazed ceramic or porcelain tiles are ideal since they resist stains and are a breeze to maintain. If you’re after a more distinctive appearance, natural stone can make a statement, but it does require regular sealing and maintenance. Outdoor spaces demand tiles rated for exterior use, especially those designed to withstand freeze-thaw cycles if needed.
Tile size also plays a role in how your space looks and functions. Large-format tiles can make a room feel more open but need a level surface for proper installation. Smaller tiles, while more forgiving on uneven surfaces, can provide better grip in wet areas.
Once you’ve chosen your tiles, make sure you have the right tools to install them with precision.
Having the right tools on hand can save time and ensure a polished result. Here’s what you’ll need:
Don’t forget safety gear like safety glasses and knee pads, especially for lengthy projects. Accurate measuring tools - such as a tape measure, chalk line, and level - are essential for a straight, professional layout. A tile scribe will help you mark cutting lines around fixtures for a perfect fit.
With materials and tools ready, it’s time to plan your budget and schedule. Tile installation costs in Sacramento can vary, and while hiring professionals is an option, many homeowners choose to save by going the DIY route. Materials often make up the bulk of the budget, so don’t forget to account for waste and unexpected repairs.
As for timing, a typical project can take several days. You’ll need time for surface prep, laying tiles, grouting, and cleanup. Follow manufacturer instructions for adhesive and grout drying times to avoid rushing. Ordering materials ahead of time can help you stay on track.
Sacramento adheres to California building codes, with some local adjustments that could impact your project. For wet areas like bathrooms and showers, proper waterproofing is a must. Installing waterproof membranes behind tiles is often required. While simple tile replacements might not need a permit, structural changes, new fixtures, or plumbing updates usually do. It’s a good idea to check with Sacramento’s Development Services Department before starting major renovations.
Electrical safety is another important factor. For example, GFCI protection and correctly sized circuits are necessary for heated floors. In multi-story or wood-frame buildings, fire-rated assemblies may also be required.
Lastly, given Sacramento’s seismic activity, flexible sealants and proper expansion joints can help tiles withstand movement. Always consult local building officials to ensure your project meets the latest requirements and recommendations.
Getting the surface ready is one of the most important steps for a durable tile installation. It’s where many DIY projects either succeed or fall apart. Taking the time to do this properly will save you from future frustrations.
Start by inspecting the surface you plan to tile. Look for cracks, stains, or any loose areas. If you’re working with concrete slabs, make sure they’re free of oil stains, dirt, and debris. Walk over the area and listen for hollow sounds - these could indicate weak spots. Fill any cracks wider than 1/8 inch with concrete filler, and if you’re using a plywood subfloor, secure loose boards with screws.
For plywood subfloors, ensure you’re working with exterior-grade plywood that’s at least 5/8 inch thick. Press down on different sections to check for squeaks or flexibility. Replace any sections that are water-damaged or warped.
If you’re using cement board, which is ideal for wet areas, inspect it for loose screws or damaged edges. The surface should be completely flat, and all screw heads should sit flush to avoid issues with the tiles later.
Once your surface is repaired and stable, clean it thoroughly with a degreasing cleaner. Let it dry completely. Even tiny amounts of dust, grease, or leftover adhesive can prevent tiles from sticking properly. Use a shop vacuum to clean up corners and edges, where dirt tends to collect. After cleaning, you’re ready to install waterproofing to protect the surface.
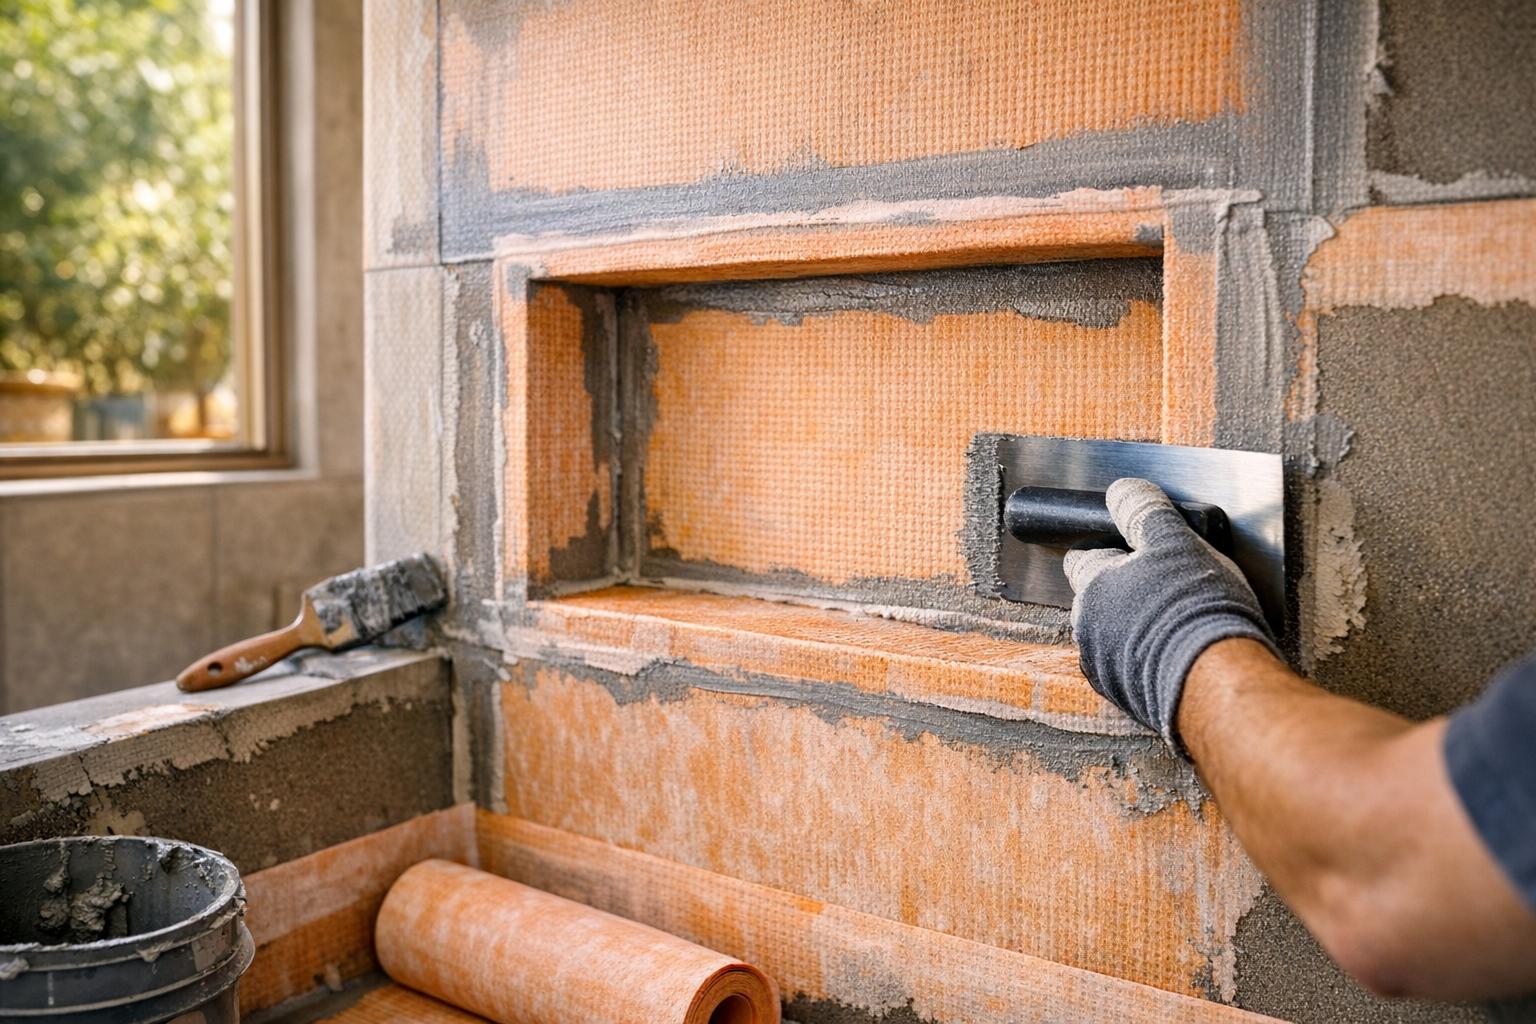
In wet areas, waterproofing is a must - and in places like Sacramento, building codes require it. Apply two coats of a liquid waterproof membrane, such as RedGard or Aqua Defense, making sure the first coat dries completely before adding the second.
Pay extra attention to areas like shower corners and where walls meet the floor. Use waterproof fabric tape to reinforce these joints before applying the membrane. Extend the membrane at least 6 inches beyond the edges of the shower area for added protection.
Alternatively, you can use sheet membranes like Schluter-Kerdi. These plastic sheets adhere directly to the surface with a modified thin-set adhesive. While they take more precision to install, they provide excellent long-term moisture protection when done right.
Even areas like kitchen backsplashes behind sinks benefit from some moisture protection, even if it’s not required by code. A simple primer-sealer can keep water from seeping through grout lines and damaging the wall underneath.
Be patient during this step. Liquid membranes usually need 24 hours to cure completely. Skipping the drying time can compromise the waterproofing and lead to future issues.
Once your surface is clean and waterproofed, it’s time to level it. Even small uneven spots in the floor can cause tiles to sit unevenly, leading to a problem called lippage. Use a 4-foot level to check for high and low spots across the area. Low spots up to 1/2 inch deep can be fixed with a self-leveling compound, while high spots may need to be ground down.
Follow the instructions on the self-leveling compound carefully, as it usually sets quickly - within 10 to 15 minutes. Pour it in a continuous ribbon and spread it evenly with a gauge rake. Although the compound will naturally flow to level itself, you may need to guide it into corners or around obstacles.
If you’re adding electric radiant heating mats, now is the time to install them over the prepared surface. These mats are a great addition, especially in climates like Sacramento’s, where mornings can be chilly even if the afternoons are warm.
For extra protection, consider adding uncoupling membranes like Ditra. These sheets help absorb movement in the substrate, preventing cracks from transferring to your tile surface. They’re especially useful over wood subfloors or in areas prone to seasonal shifts.
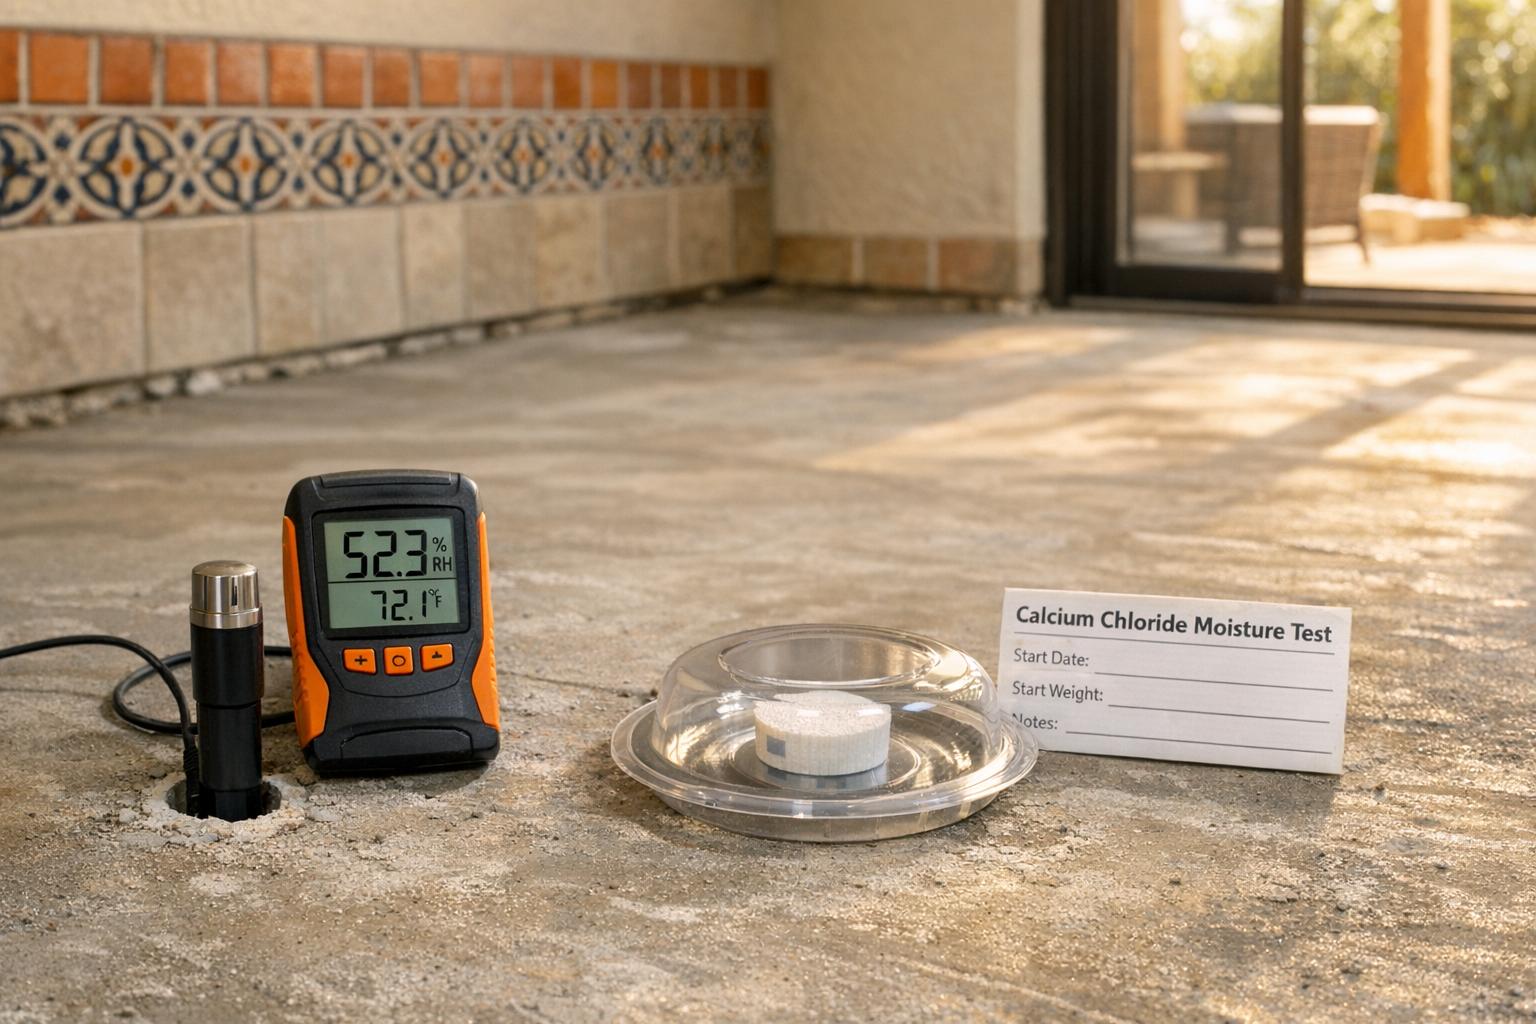
Finally, give all leveling compounds and adhesives enough time to cure. Most products need at least 24 hours, but in humid conditions, it may take longer. A moisture meter can help confirm when the surface is ready for tile installation.
Once your surface is prepped and leveled, it's time to start laying out and installing your tiles. This step requires precision, so take your time to avoid mistakes that could be difficult to fix later.
Before opening any adhesive, plan where each tile will go. Start by finding the center of the room. Measure the length and width, then mark the halfway points on opposite walls. Use a chalk line to snap two perpendicular lines that intersect at the center of the room.
Dry-fit your tiles along these lines to visualize the layout. This helps you see the pattern and ensures you won't end up with narrow slivers of tile along the walls. If you notice that edge cuts will be less than half a tile wide, adjust your starting position by half a tile in one or both directions.
For diagonal patterns, rotate the chalk lines 45 degrees to create a diamond layout. This design can make small rooms feel more open but requires extra cuts and may generate more tile waste.
Pay attention to doorways and transitions to other rooms. Aim for full or large partial tiles in these visible areas. If the layout results in small cuts near entrances, adjust your starting lines accordingly. Mark your revised starting points with chalk, and double-check your measurements. Once adhesive is applied, changing the layout becomes much harder and more expensive.
For most tile installations, thinset mortar is a reliable adhesive, especially in areas prone to moisture. This cement-based product provides a strong bond and works well in wet environments. For added durability, use modified thinset, which includes polymers like acrylic or liquid latex for improved bonding.
Mix only as much thinset as you can use within 30 minutes. Follow the manufacturer's instructions carefully, combining the powder with water in a clean bucket. Use a drill with a mixing paddle to create a smooth, lump-free paste. The mixture should resemble thick peanut butter - firm enough to hold its shape but easy to spread.
Spread the thinset using a notched trowel held at a 45-degree angle. The notch size depends on your tile dimensions: 1/4-inch notches are ideal for smaller wall tiles up to 8 inches, while larger floor tiles may need 3/8-inch or 1/2-inch notches. Apply the adhesive in one direction and then comb through it with the notched edge to create even ridges.
Work in 3×3-foot sections to prevent the thinset from drying out before you set the tiles. For tiles larger than 12 inches, consider back-buttering by applying a thin layer of thinset to the tile's back to ensure full contact with the surface.
Press each tile firmly into place with a slight twisting motion, using a rubber mallet if needed. Avoid sliding tiles into position, as this can push adhesive into the grout joints. Use tile spacers at each corner to maintain consistent gaps - 1/16 inch for wall tiles and 1/8 inch for floor tiles.
Periodically lift a tile to check for full coverage. If you notice bare spots, you may need a larger notch trowel or additional pressure when setting the tiles. Have your cut tiles ready before moving on to areas that require them.
For edges, outlets, and fixtures, you'll need to cut tiles to fit. A wet saw is the best tool for clean, precise cuts, particularly with porcelain or natural stone tiles. These saws use a diamond blade and a water-cooling system to minimize chipping and overheating.
For straight cuts, measure carefully and mark the cut line with a pencil. Align the tile with the wet saw's fence and feed it slowly to avoid chipping.
If you're working with ceramic tiles up to about 1/2 inch thick, a manual tile cutter can save time. Score the tile surface with steady pressure, then snap it along the scored line. While faster for simple cuts, manual cutters aren't ideal for natural stone or harder porcelain tiles.
For curved cuts around pipes or fixtures, use tile nippers. Mark the cut line and lightly score it with a utility knife. Gradually remove small pieces rather than attempting a large cut all at once.
To create holes for pipes, use a diamond-tipped hole saw attached to a drill. Alternatively, drill several small holes along the perimeter, then remove the center and smooth the edges with nippers.
Always work in a well-ventilated area and wear proper safety gear. Organize and label your cut tiles if you're tackling a complex pattern. Test-fit each piece before applying adhesive - it’s far easier to trim a tile that's slightly too large than to deal with one that's too small.
Since thinset sets quickly, have your cut tiles prepared before applying adhesive in areas that need them. Focus on completing full tiles first, then return to install the cut pieces around the edges. This systematic approach will save time and ensure a polished finish.
Once the adhesive has set (at least 24 hours), it’s time to start grouting. This step pulls everything together, turning your tiled surface into a polished, cohesive finish. It’s the final touch that completes all the effort you’ve put into the project.
Begin by mixing only as much grout as you’ll need, following the manufacturer’s instructions. Combine the grout powder with clean water in a bucket, aiming for a thick, spreadable consistency that holds its shape. For most home projects, sanded grout works best for joints wider than 1/8 inch, while unsanded grout is ideal for narrower joints or delicate materials like glass or natural stone tiles.
Using a rubber grout float held at a 45-degree angle, spread the grout diagonally across the tiles. Press it firmly into the joints in small sections. Once the joints are filled, scrape away any extra grout from the tile surfaces using the float’s edge. Work diagonally and hold the float nearly vertical to avoid disturbing the grout lines.
After about 15–20 minutes, the grout will begin to set. At this point, clean the tiles with a damp sponge, rinsing it often to avoid leaving a hazy film. Use gentle, circular motions to clean without disrupting the grout lines, and keep changing your rinse water for the best results. Once the initial cleaning is done, let the grout cure briefly, then go back with a clean, barely damp sponge for a final wipe to remove any remaining haze.
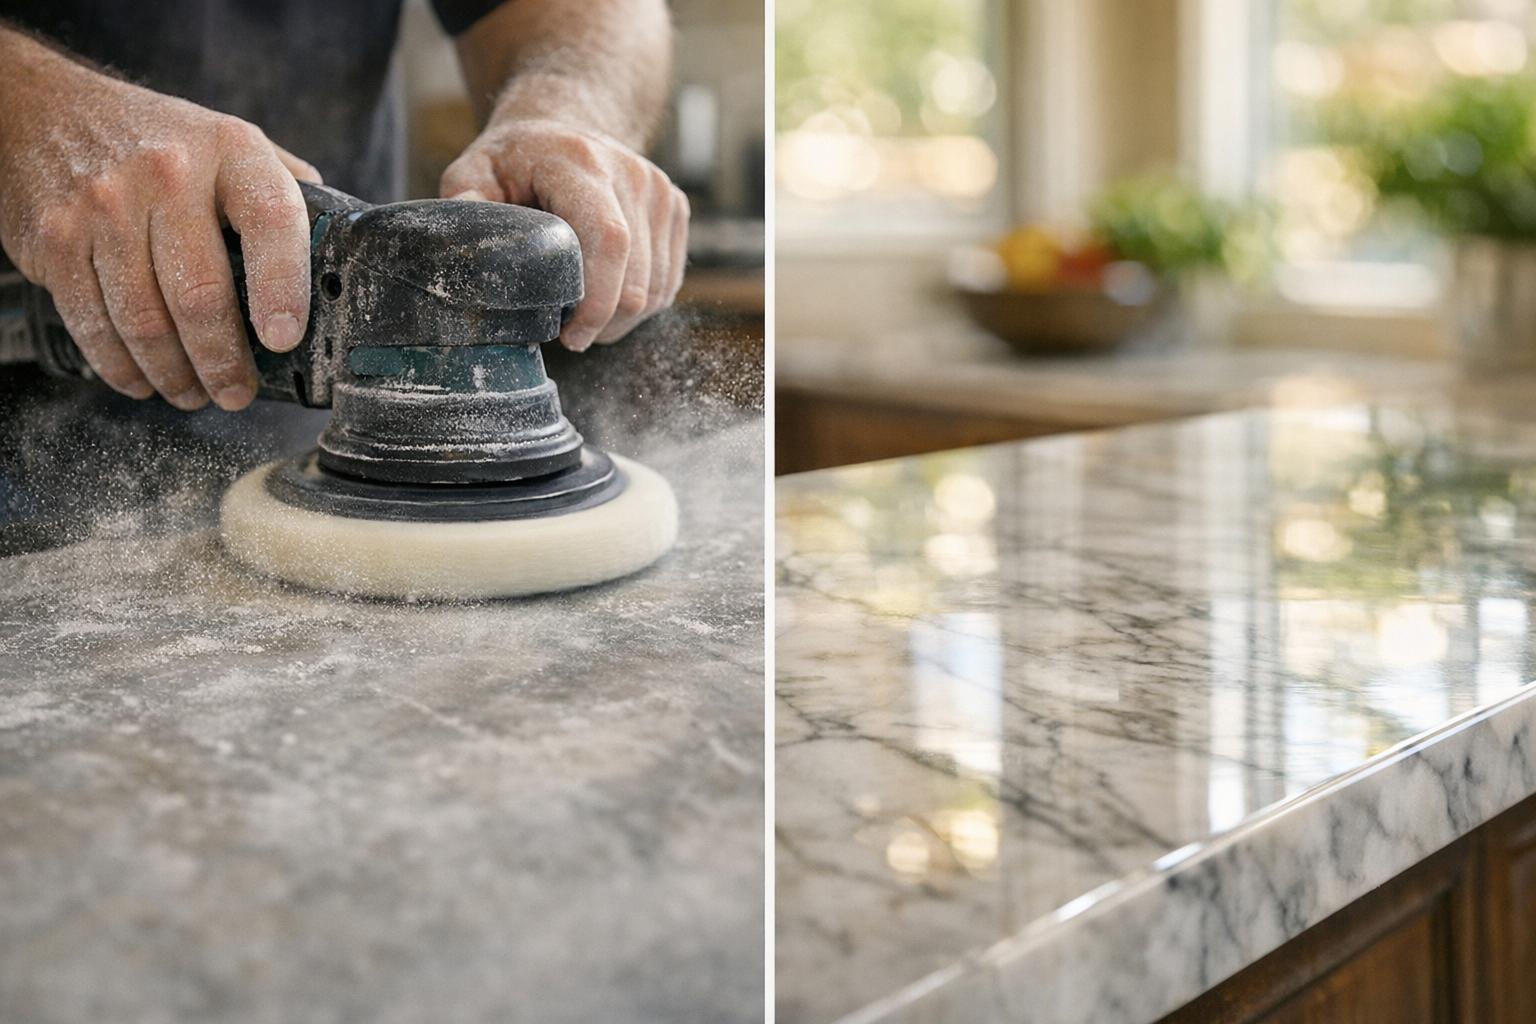
Once the grout is clean and fully cured, sealing comes next. This step helps protect your work and ensures durability. Timing is critical here.
"Don't apply sealers or polishes for three weeks, and then only in accordance with manufacturer's recommendations." - Daltile
Allowing the grout to cure fully during this waiting period ensures it achieves maximum strength. Applying sealer too early can trap moisture and weaken the grout.
For moisture-prone areas like bathrooms and kitchens, silicone sealant should be applied around edges exposed to water. This includes places where tiles meet bathtubs, sinks, shower trays, and countertops.
"Sealant joints, which are mandatory in all tile installations, will complement or coordinate with the grout color." - Ceramic Tile Education Foundation (CTEF)
When applying silicone sealant, cut the tube tip at a 45-degree angle to create a bead slightly smaller than the joint width. Apply steady pressure as you move the caulk gun along the joint, and immediately smooth the sealant to form a concave shape that helps shed water.
After sealing, take the time to inspect your work thoroughly.
Walk across the tiled surface and check that all tiles are firmly adhered and grout lines are uniform. Press gently on individual tiles to ensure they feel solid and don’t move. Examine the grout lines for consistent width and depth, and look for any gaps or cracks. Small voids can typically be filled with extra grout, but larger issues may require removing and redoing the affected tiles.
Pay close attention to corners, edges, and areas where tiles meet walls or fixtures. These transition zones should be caulked, not grouted, to accommodate natural movement. Use a level to confirm the surface is even, especially in areas like shower floors where proper drainage is essential. Ensure that water flows toward the drain without pooling.
Finally, allow the installation to cure for 72 hours before exposing it to heavy foot traffic. During this time, only light cleaning or touch-ups should be done to give the adhesive and grout time to fully harden. This extra patience ensures your tile floor is ready to handle daily use.
Sacramento's climate and building requirements bring unique challenges that demand tailored solutions. To ensure your tile installation stands the test of time while meeting local codes, careful planning and execution are crucial.
Sacramento experiences a hot-summer Mediterranean climate, which means scorching, dry summers with temperatures often surpassing 100°F, and mild, wet winters. These seasonal shifts can cause building materials to expand and contract, making proper preparation essential for durable tile installations.
For outdoor spaces like patios and pool decks, it’s critical to install expansion joints every 12 to 16 feet or wherever tile meets different materials like concrete or wood. Without these joints, tiles are at risk of cracking during temperature fluctuations.
Low humidity in the summer can speed up the curing process for adhesives and grout. To counter this, work on smaller sections and schedule tasks during the cooler morning hours. On the flip side, Sacramento’s rainy season (November through March) brings moisture challenges. While annual rainfall averages around 18 inches, heavy storms can cause issues. Waterproofing and allowing extra drying time for substrates during this period are vital steps to protect your project.
These climate factors directly influence how building codes are applied to tile installations in the area.
Sacramento’s local building codes, based on the California Building Code with specific amendments, address the challenges posed by the area’s climate and seismic activity. Adhering to these codes is essential for a successful tile installation.
In wet areas like bathrooms, waterproofing must extend behind all tiled surfaces - not just the lower portion. For showers, local regulations often require a flood test, where the shower pan is filled with water to a depth of 2 inches and monitored for 24 hours to check for leaks before proceeding with the installation.
Given the region’s seismic activity, larger tile installations must include seismic separation joints. These joints are filled with flexible sealants, not rigid grout, to accommodate minor ground movements and prevent tile damage.
For heated floors, ensure proper GFCI protection is in place. These systems must be installed by licensed professionals who can secure the necessary permits and inspections to meet local safety standards.
Sacramento’s construction market is home to skilled tile professionals who understand the region’s specific conditions and building codes. Partnering with a trusted local contractor ensures your project meets inspection requirements and avoids costly delays or corrections.
Local experts, such as Skyline Tile, bring valuable insights to the table. Founded by Ernesto Salas, the company offers design consultations to help homeowners choose materials that balance the local climate with their personal style. Their team is well-versed in adjusting adhesive working times during hot weather and allowing for extended curing periods in damp conditions - practices that prevent common installation problems.
Skyline Tile also provides a 5-year workmanship warranty, covering issues like expansion joint stress or moisture infiltration, giving you peace of mind. Additionally, local professionals often maintain strong relationships with Sacramento building inspectors, ensuring smooth project approvals.
For complex projects, such as those involving waterproofing systems or heated floors, hiring a seasoned professional is non-negotiable. These systems require precision, technical expertise, and a thorough understanding of local standards to integrate seamlessly and pass inspections. By leveraging local knowledge and experience, you can achieve a tile installation that meets both design goals and regulatory requirements.
Installing tiles successfully takes careful planning, attention to detail, and knowing when to call in the pros. This guide has walked you through the essentials - from picking the right materials and tools to addressing Sacramento's specific climate and building codes.
Skipping steps like surface preparation or waterproofing can lead to costly mistakes down the road. Taking your time at each stage is key to avoiding repairs later.
For more complex projects - like heated floors or waterproofing systems - working with local experts such as Skyline Tile can make all the difference. Their 5-year workmanship warranty offers added confidence, ensuring your installation stands the test of time.
When choosing tiles, it’s important to think about the purpose and conditions of each room. For spaces like bathrooms or kitchens, where moisture is a concern, go for water-resistant and slip-resistant options like porcelain or ceramic tiles. In areas with heavy foot traffic, prioritize durable tiles that can handle constant use without showing wear. For living rooms or bedrooms, you have more flexibility to emphasize style and design, using decorative patterns or larger tiles to create a warm and welcoming vibe.
Don’t forget to consider maintenance requirements. Natural stone tiles, for example, often need sealing, while ceramic tiles are generally easier to clean and maintain. Choosing tiles that align with the room’s needs will help you achieve a balance of practicality and visual appeal.
To make sure your tile installation aligns with Sacramento's building codes, begin by reviewing the Sacramento Residential and Building Codes. Focus on key areas like proper substrate preparation, installing moisture barriers, and specific guidelines for tiles in bathrooms or outdoor spaces. These codes are designed to address safety, durability, and the local climate.
If you're uncertain about any regulations, it’s a good idea to consult with a local building inspector or a licensed contractor who knows Sacramento's requirements well. Being proactive can save you from expensive errors and ensure your project meets all the required standards.
To achieve a flawless tile installation, steer clear of these frequent missteps:
A successful tile installation starts with careful planning, thorough surface prep, and precise application of materials. Take your time to ensure a smooth, durable finish.